Installation
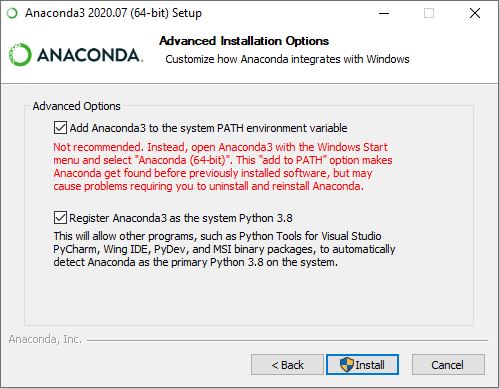
Download and install the latest version of Anaconda3. Be sure to check the optional “Add Anaconda3 to the system PATH environment variable” box during installation:

Check your installed version of conda using:
$ conda --version
Create a new conda environment with python 3.8 or above:
$ conda create -y -n <name-of-repository> python=3.8 pip
$ conda activate <name-of-repository>
For example, if you’re using the EULP-data-analysis repository:
$ conda create -n eulpda python=3.8 pip
$ conda activate eulpda
(If you’re using a version of conda older than 4.4 or you’re working outside of the Anaconda Prompt, e.g. using Git Bash, you may need to instead use source activate <name-of-repository>.)
Ensure that you have navigated to the top level of your cloned repository. You will execute all your pip commands from this location. For example:
$ cd /path/to/repository
Make sure you are using the latest version of pip:
$ pip install --upgrade pip
Add or update any dependency packages to the install_requires list in setup.py (file located at the top level of each repository). For example, maybe for the analysis pandas is needed for dataframe manipulation and matplotlib is needed for plotting. The following code block shows how to add these packages to setup.py.
install_requires=[
    'pandas',
    'matplotlib'
],
Install the environment needed for this repository:
$ pip install -e .[dev]
The previous command will install all the dependency packages that are called out in the setup.py file. Some of these packages are required for running things like tests and coverage, while others are required to run classes and methods found in the source code files.
Some End Use Load Profile packages require additional installation steps to be performed.